Showing posts with label artful journey. Show all posts

Friday, February 22, 2019

The Spark of a Memory

2-27-12

I was sitting in a meeting last week when an image having absolutely nothing to do with the subject at hand popped into my head. It was an image of a sweet little set of stone steps carved into the side of a hill, covered in mossy greens, that led to a trail my friend Leah and I walked during the first Artful Journey retreat I attended back in 2010. I got lost in the memory and completely zoned out of the meeting for a few moments before I found myself back to where I was currently sitting.

The first Artful Journey retreat truly was magical for me, and it continues to have a lasting impact on my life to this day.  I had struggled a bit initially going because it felt a little selfish to spend the money to fly all the way across the country to spend five days playing with art, just for me, but once I did it, I realized how important it was for me. I remember talking to my husband by phone the second or third day of that first retreat and specifically telling him, "Just so you know. I will be back here. I will be coming every year this is offered"... and I did.  I heard that the retreat center had recently been sold, so when I got back up to my hotel room after my meeting, I googled the Presentation Center and came across this article. It seems these students missed the place and the memories made there as much as I do! I think the timing of the memory must have just been a familiar longing as this is the time of year that I went to those retreats. I attended the last one in 2016.

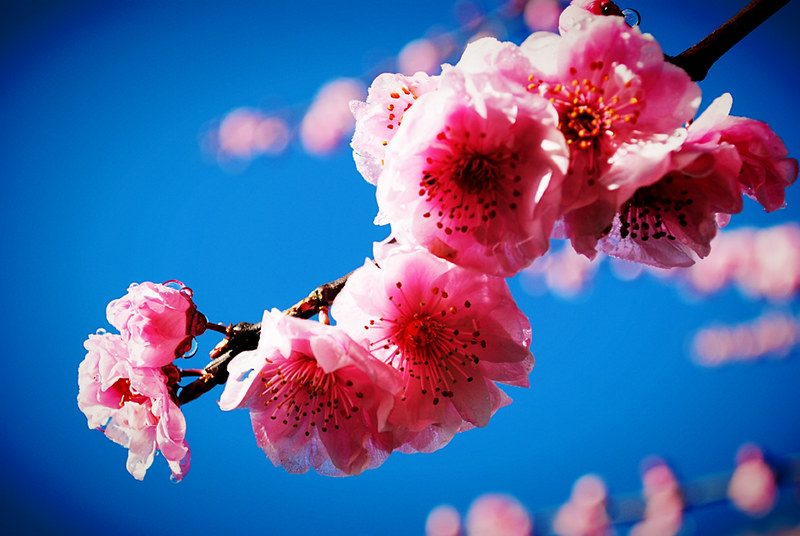
When I got home from the meeting, I searched my photos from the retreats, and I couldn't find a photo of those steps. They'll have to remain in my memories. This photo, however, was taken on the trail the steps led us to.  The Artful Journey retreats were so special to me they have their own category here on my blog. You can search those posts here to see what I created at each retreat and read my stories about them. Such sweet memories. Wish I could go back again!

Thursday, March 10, 2016

The 2016 An Artful Journey Project...

LL3

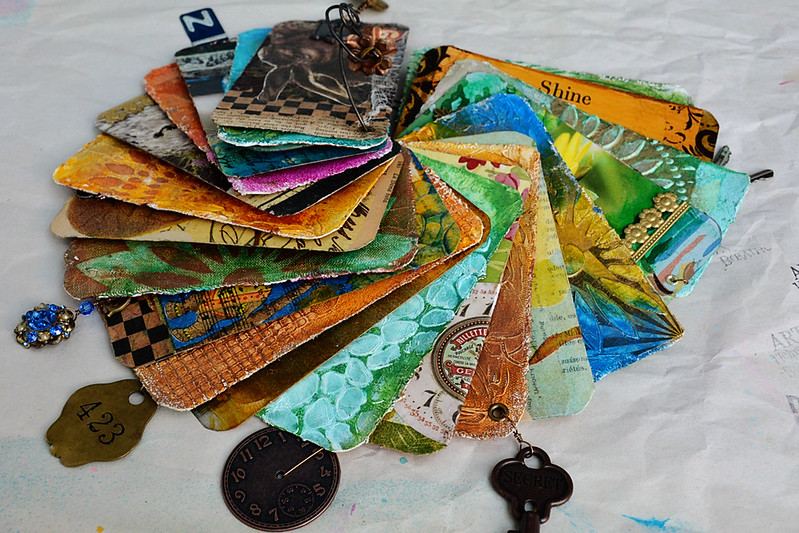
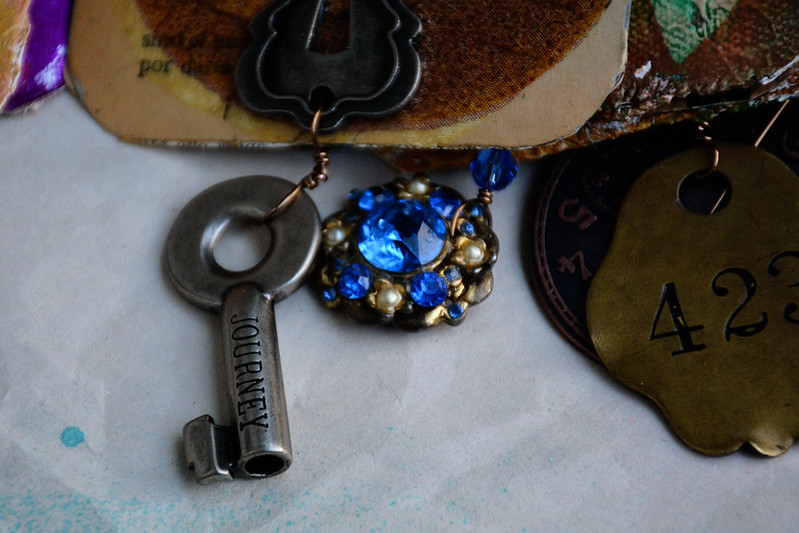
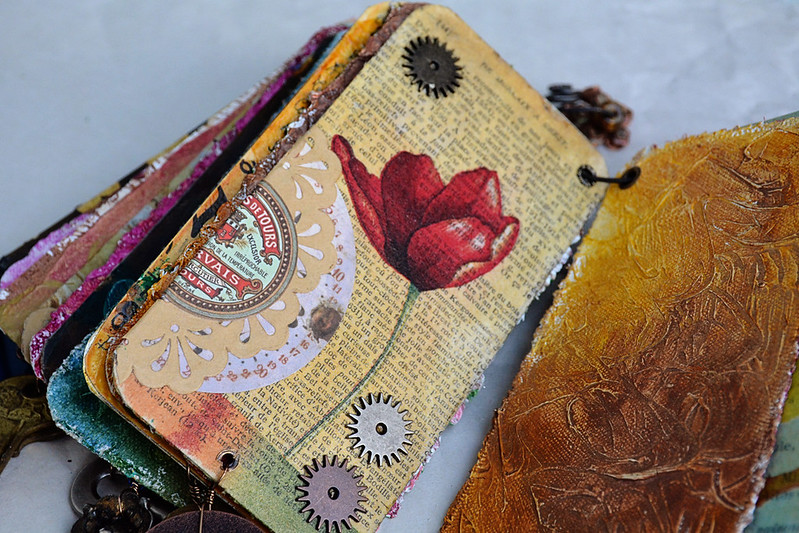
For this last Artful Journey, I took a class with Leighanna Light. I love that Leighanna calls herself a "Thingmaker!"  We created two "decks," one metal and one out of canvas and plaster. The individual pages are 6" tall by 3" wide. It's so hard to share this project in pictures. You really need to hold it!

LL4

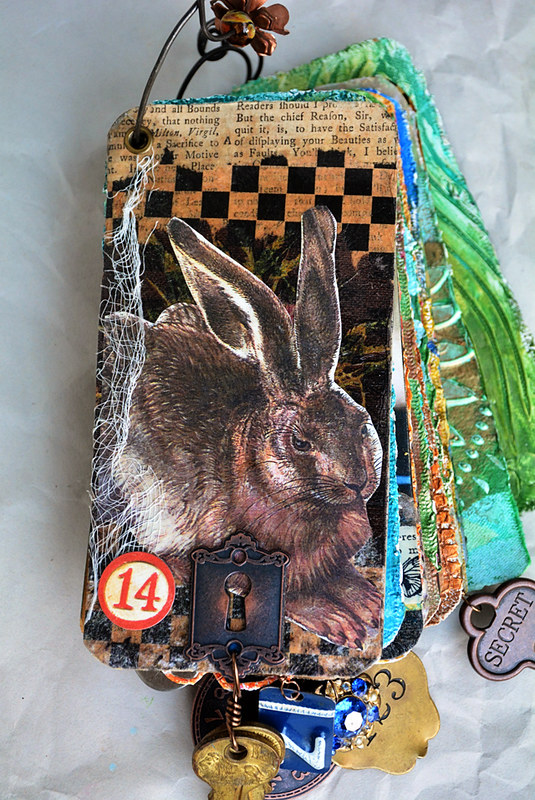
The rabbit collage above is an example of the metal deck. And an example of an "oops!" that I fixed! Behind that rabbit was another collage that didn't work out very well because I used a cool owl napkin separated out into just the top ply, but I placed it over a darker background. Because the owl was white, he just faded into the dark background and you really couldn't see him. A classmate had this beautiful little bunny that she shared with me, and she fit perfectly over the owl and ultimately became the cover of the deck. The substrate is the metal, and then I added some old book paper, two different kinds of tissue paper, added in a little cheesecloth there on the left and finished it with the keyhole and some keys. I used keyholes throughout the whole deck.

LL9a

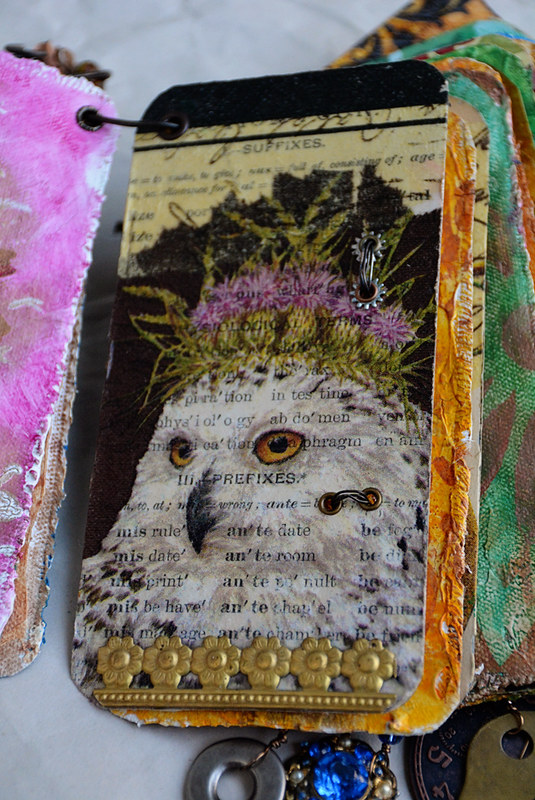
I did another collage with the owl (above), making him stand out much more clearly by using a piece of very light cream book paper behind him, and he then became my other favorite in the metal deck.

LL20b

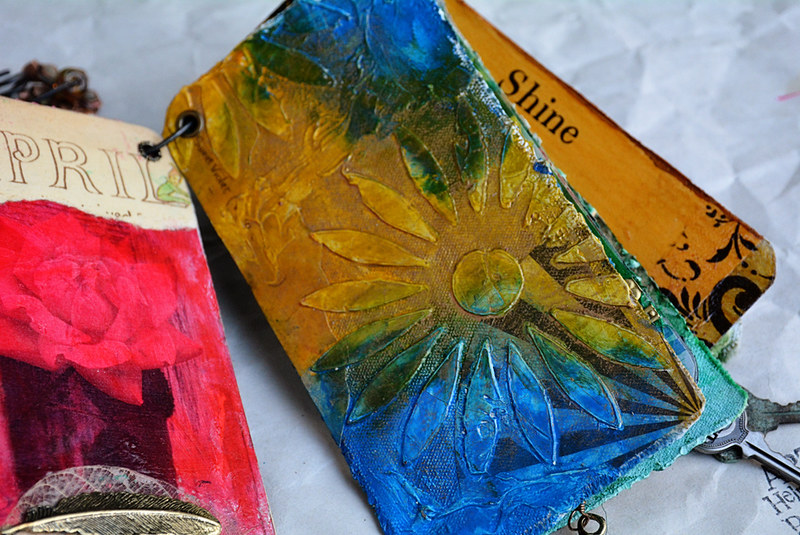
Above is an example of the plaster on canvas. We started with canvas pieces and then added your basic Venetian plaster from Lowe's with a palette knife. Here I added the plaster to the canvas through a stencil and then added watered down acrylic paints for color and then topped it with a gold metallic Shiva paint stick borrowed from another classmate. I loved that paint stick and used it on quite a few pages! Must get some!

LL20b

Above is another example of the plaster on canvas technique, also done with a stencil and palette knife. Leighanna's work is gorgeous and she used pretty earth tone colors in her examples, but if you've been following this blog for any length of time, you know I'm not a muted earth tone kind of girl. Give me glorious, riotous color!

LL36

Most of the metal pages contain little added doodads as embellishment. I used my trusty Crop-A-Dile to punch the holes and add the eyelets. I started adding the embellishments the last afternoon of the class but just got frustrated because I knew my jewelry tools and wire I had at home would make the job much easier, so I finally gave up and finished it all up at home.

LL18a

I could share tons of pictures here with you, but it would probably be easier for you to just pop over to this Flickr set which contains tons of pictures of the whole project.

In closing, what can I say about this whole journey? I started my journey into mixed media by taking a huge leap and attending DJ Pettit's class at An Artful Journey in 2010. I had very little experience at the time and immediately felt like I was in way over my head. But through the help of DJ's encouragement and gentle guidance, I produced a crazy-color Kelly version of a DJ book that I'm still incredibly proud of to this day. That year followed classes with Albie Smith (twice!) that lit a fire for my love of bookmaking, and a class with Orly Avineri, who challenged me to give into the process and try things a little differently. Not sure I ever told Orly, and I realize I never shared it here, but one of the spreads from the journal I created in Orly's class was selected for publication in Dawn Sokol's book A World of Art Journal Pages. (I'm on page 214 and featured on the Table of Contents page.) So my last journey was with Leighanna, and such a delight she was. She was funny and free-spirited and gave us free reign to completely make it our own. "Sure! Try that!" was heard often!  I wasn't sure what I'd do with this mess of metal and plaster cards when I brought them home, but I'm so happy I combined the two together and ended up with something I want to carry around with me and show everyone I see!

Thank you, Cindy Woods, for providing this vehicle for artistic growth for so many lucky women. I'm forever grateful to you for creating the avenue to my very first art retreat and now, six years later, constant paint and glue under my fingernails, happily.  You can see posts from all my Artful Journeys with Cindy here.

Wednesday, March 5, 2014

An Artful Journey Sneak Peek!

Book signatures ready for sewing.

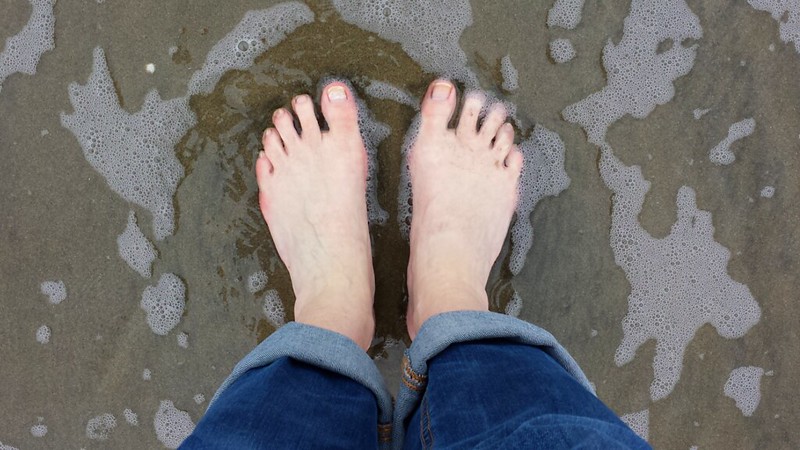
This past Thursday-Monday, I was in California for An Artful Journey. This was my fourth year attending this amazing retreat. I'm still trying to catch up on my sleep, but I wanted to give you a quick sneak peek! The photo above is of some of my paste paint and paper book signatures that became a gorgeous book with a very cool stitch pattern and spine. And below, the Florida girl had to take a quick trip to the beach to stick her toes in the Pacific. It was darn cold! I'll photograph my artwork from the retreat this weekend and share next week! In the meantime, click here to see some of my posts from previous Artful Journey retreats!
 
Toes in the Pacific

Thursday, March 21, 2013

An Artful Journey Wrap Up!

AAJ 9

Wow, what a crazy three weeks it's been! I wanted to finally share some of my work from An Artful Journey. Once I returned from the trip, I came home to a crisis at the shelter, so I was absorbed in helping get 15 dogs adopted or fostered or they were going to be put down. We've been working so hard to earn no-kill status each month that we just couldn't let those dogs be euthanized. Thankfully, we found a permanent or foster home for every one of them!

  AAJ 4

So between the jet lag from the trip, working for those dogs and just general craziness at the day job, it's taken me three weeks to finally get back to sharing some pictures with you.  This class was definitely different from my other An Artful Journal retreats. Instead of producing a larger body of work like I did the first two years, I came away this year with just one just five-spread art journal. But I learned a lot and still gained immeasurably from the experience.

AAJ 10

Each journey I've taken with this retreat has taught me something different. The first year, going there not knowing a soul and as a complete newbie to mixed media, I made many new art friends and found a lot of confidence under the amazing and gentle guidance of DJ Pettitt. The next year, I totally fell in love with paper decoration and book making with the help of Albie Smith. This year, well, this year, I definitely affirmed some things about myself as well as learned a few new things from Orly Avineri.

AAJ 11

I will admit, I struggled a bit with this class.  And my struggles were tied to the fact that I am just not very good at following rules. It's funny, because one of the trainings I do on campus is True Colors, a personality inventory that we use extensively with our students (take a quick free version of it here). I'm an Orange. One of our qualities, for better or for worse, is that we don't always (actually, we very rarely) follow the rules. We are definitely out of the box thinkers who like to blaze our own trails. This is helpful in many situations, as we discover new ways of doing things because we aren't afraid to take a risk, and it can also hinder in other situations, as sometimes, well, you just have follow the rules. Orly and I had a long one-on-one talk about that, and I think we both learned a lot from each other about perspectives.

AAJ 12

In addition to getting a little internal perspective, I also learned some fun new techniques from Orly. My favorite is the way she taught us to work with Tim Holtz Distress Inks and matte varnish. Wow! The mixture gave our pages a beautiful, cohesive finish that made our images just jump off the page. Unfortunately, I also discovered that I must be allergic to the matte varnish because I developed a terrible rash on my hands by Saturday that lasted a good week after we wrapped up. Gloves next time!

AAJ 14b

Orly also helped me see how fun it is to incorporate my own photographs into my journal pages. Duh. You would think that since I was a photographer before I was an art journaler that I would have figured that out on my own, huh. I want to work more with that, playing around with how actual photographs, rather than color copies, interact with different mediums and varnishes.

The thing that made this trip the most special was sharing it with Courtney. It was fun to see it all through her eyes, and I hope she gained as much from the experience as I think she did. You can see more pictures from my finished journal in this Flickr set. Thanks for sticking with me through my three-week absence!

Thursday, February 28, 2013

An Artful Journey Liftoff!

2-27-13 Journey Buds-72

This morning, I'm heading to An Artful Journey! This is the third Artful Journey and my third trip, and I am just as excited as the very first time! I took the photo above last retreat on the property at the Presentation Center, where the retreat is held. It's located in the Santa Cruz mountains and absolutely heavenly!

Page by Orly Avineri

This year, my sweet friend and former student Courtney Ellis will be traveling with me, so that will make the trip extra special. We are taking a  three-day class with the lovely Orly Avineri, who's work you see here. Here's more about Orly's class, and while you're at it, take a visit to her blog. It's full of art journaling inspiration. Back Tuesday!  Click this link to see posts from previous journeys!

Page by Orly Avineri

Thursday, March 17, 2011

An Artful Journey 2011: One Last Book

Board Book 1

The Big Book! That’s really the only way to describe it! This was the biggest book I created, and it encompassed many of the techniques used in the smaller books. Here’s what we did…

Board Book 2

This book is 8”x10”. The exterior covers, interior covers and signature covers are all paste paper pages trimmed to the size needed for the finished book, so I created all those papers first. Albie demonstrated the technique for covering the book board covers with our designated cover papers and then gluing in the book cloth spine. Then we measured and trimmed papers for our signature pages. Mine has three signatures and are sewn in with a pamphlet stitch (can you tell I’m a simple pamphlet stitch fan?) I used paste papers as covers for each of the signatures to add more color to the interior of the book. The paper itself is Stonehenge, so it’s good and strong for adding juicy water colors or acrylics.

Board Book 3

I sit here and look at this pile of books I created in three days, and I wonder when I slept! (Okay, so I didn’t sleep much…) But what a wonderful learning experience it was. There are so many ways I can put all this to use that my brain is just overflowing with ideas. I’m even working on simplifying some of these books to use as projects for Mermaids and Mamas Artful Adventure 2011 (scheduled May 14-15 this year, more details to come soon! Click here to read about last year's Adventure) The last thing I’ll have to share with you in my next Artful Journey 2011 post are beautiful pictures I took around the retreat center.

Happy St. Patrick's Day from this Irish girl to you!

Tuesday, March 15, 2011

An Artful Journal 2011: Little Treasures

Treasure Books, spines
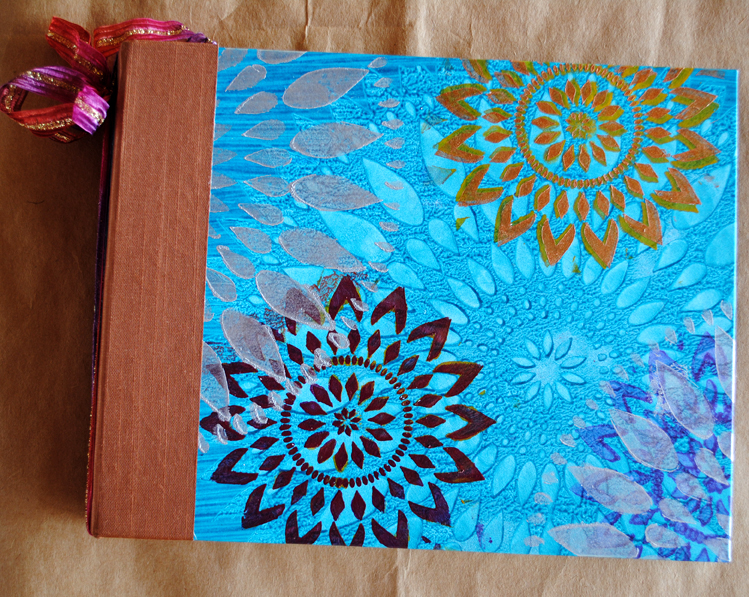
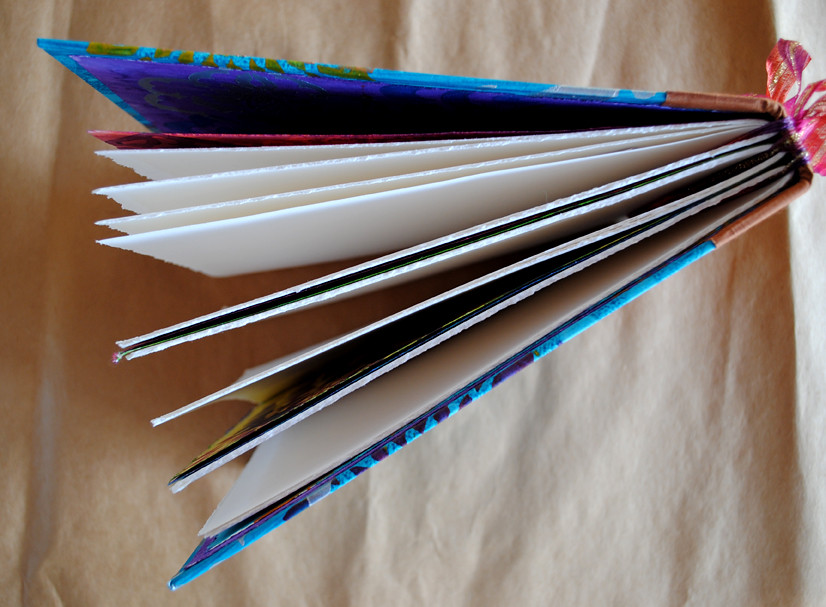
So, on to more book forms I learned at An Artful Journey! These little gals were most definitely the most challenging thing I learned. Like the Noble stitch books, I made two to try to cement the process in my head, but I’m definitely going to need some reminding on the stitch. This is called a French Twist stitch, and it’s a variation on a long stitch.

Treasure Book 1, Front Cover

Treasure Book 1, Top
As for the process, we started by cutting our book boards to the size we wanted first. These work best as small little treasures; my books are about 3” x 4”, but Albie’s class sample was even smaller than that. It takes four pieces of book board cut to your desired size. Both covers are actually two pieces glued together with the ribbon sandwiched and glued in between.

Treasure Book 1
Treasure Book 2, Front Cover
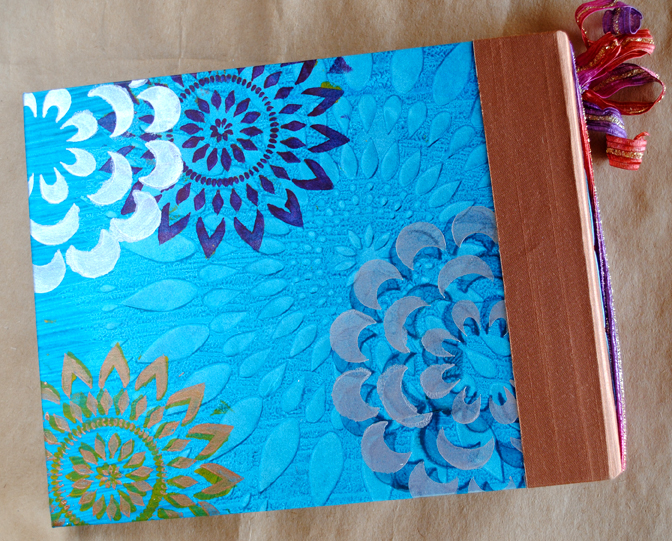
The texture acheived on the covers was done using that magical thick gesso mentioned down here and stencils. Pretty cool, huh? I kept mine pretty simple and didn’t attempt to do quite as detailed of a painting technique as Albie did (I have no patience and no comfort with a tiny paint brush!).

Treasure Book 2, Back Cover
Once our covers were completed, we tore our paper to size. These particular books have nine signatures, but the number of signatures is up to you. Then it was all about the stitching, weaving the ribbon through the French Twist to anchor it. On the aqua book, I forgot to add in my closure ribbon before I glued the pieces together so I just tied it with an exterior ribbon. When I went on to the second book, I didn’t make that mistake!

Treasure Book 2, Interior
Treasure Book 2, Spine
These books truly are little treasures and were pretty time-consuming. I’m sure I will attempt a few more though; I do believe I’ll be addicted to that thick gesso and all the magic it can create. Cindy has been posting tons of pictures on her blog; go over and take a peek at the two posts linked below so you can get a feel for the whole retreat. In this post in the first couple of pictures under “Albie’s Class,” you can see me with my old lady glasses actually learning the stitch for this book. In this post, there I am in the third picture, looking all grungy with my paint-splattered apron, camera in hand (and I must say I thoroughly enjoyed doing absolutely nothing to my hair all weekend; going hair-dryer less is a wonderful thing!). I have one more book to share with you later this week!

Wednesday, March 9, 2011

An Artful Journey 2011: Gessoed and Painted Book

Gessoed and painted book, Front
Is “gessoed” a word? My spell check does not approve. Oh well. Sorry I’ve kept you waiting on my next book form! It’s been a very busy week around these parts! I think this is my favorite book of all. The construction is done with a simple pamphlet stitch (I did three signatures), but it’s the magic that takes place before the sewing that makes it so special.

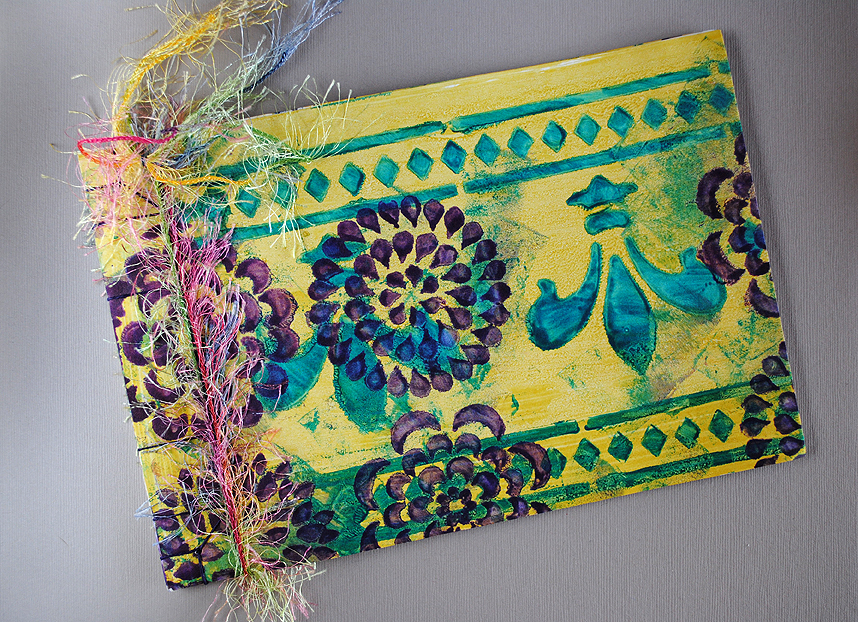
I started with a sheet of Stonehenge paper and covered it completely, front and back, with a thick gesso. We used this. There were several things we could do with this as we were gessoing the paper. We could use stencils to get some textured designs (more on that in my next book form), use stamps or mastic spreaders to stamp into the gesso, or we could simply swipe the gesso over the paper using an old credit card or used gift card. For this one, I went the third route and left it a bit messy in spots to give it a little bit more texture. I gessoed one side of the paper and then completely let that dry before I did the other. I actually used a full 22” x 30” sheet of Stonehenge in this process, but you can trim down your paper to your desired size before you gesso, which is what I’ll be doing when I create these at home.

Gessoed and painted book, Back
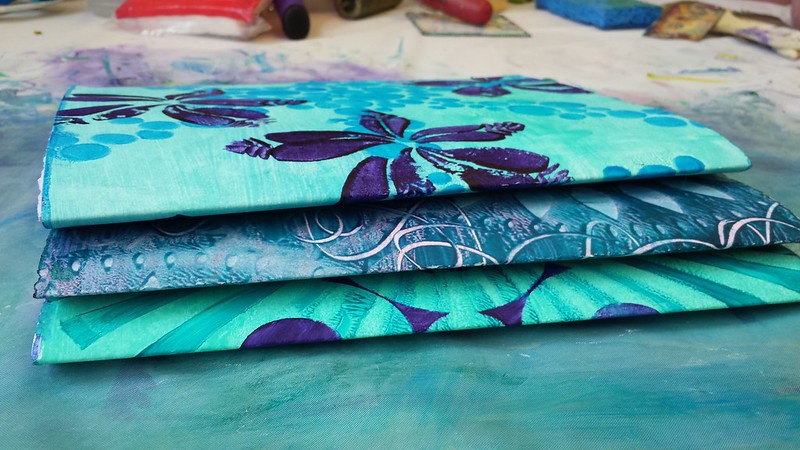
Once the gesso was dry, I trimmed my big sheet down to the size of book cover I wanted, taking into account that I wanted a pocket on the inside. I can’t tell you exact measurements because I didn’t really do exact measurements; I just went with what looked right! I started on what would be the outside of the cover and first painted a solid, watered-down deep turquoise as the first layer. Once that dried, pretty quickly actually, I used a foam rubber stamp dipped in copper metallic paint for the all over design. Once that side dried, I turned it over and painted what would be the inside of the cover, again in that turquoise, but a little deeper color this time. Then once the inside dried, I folded up the bottom to create the pocket. The pocket is secured with this really awesome, super thin, super sticky double-sided 4m tape Albie shared, which I must find!

Gessoed and painted book, Top
From there, it’s on to the stitching. I tore my pages from Stonehenge, allowing for a bit of fanning out in each signature, and sewed each signature into the spine, simply folded, using a pamphlet stitch for each one. Of course, there is more measuring involved than I’ve shared here, particularly in placing the sewing holes on the cover/spine, but I can’t quite wrap my brain around how to explain that right now! Come to my studio and I’ll show you! :-)

Gessoed and painted book, Inside Cover showing pocket
You really have to see and feel this book in person to get the full effect. The gesso over the paper makes it feel like leather, much like molding paste does to a soft muslin fabric liked I used in the book I created in DJ’s class last year. And again, the eyelash yarn woven through is just for a little extra Kelly bling; it’s not actually incorporated into the actual sewing of the book. I LOVE this book! I’ve ordered the gesso and paper and plan to get started creating a lot more of these!  I'd told DH we simply have to expand my studio. :-)  I need more space!  Scroll down to see the other books I've already shared.  Three more books to go!

Thursday, March 3, 2011

An Artful Journey 2011: Noble Stitch Binding

Noble Stitch Book 1, Front
Ready for the next two books I created at An Artful Journey? These two are done with what Albie called a “Noble” stitch. I understand it also can be called a Japanese stab binding. I could not find any Noble stitch tutorials on You Tube, but I did find a few for the Japanese stab binding. While it’s very similar to what we did here, it’s not exactly the same. With Albie, we did this cool little triangular detail on the corners. She’ll be emailing us all the instructions soon, so I’m glad I’ll have those to fall back on!

Noble Stitch Book 1, Back

Noble Stitch Book 2, Front

Noble Stitch Book 2, Back

Noble Stitch Book 2, Stitch Detail (Click to enlarge on all)
These again started with our painted paste papers, and again I made two to try to cement the stitch in my head. These covers are cut to 6” x 9”, and then I tore Stonehenge paper just a tad smaller for the interior pages. The one difference about this one it is really doesn’t have a signature per se, if you consider signatures folded and nested pages. With this technique, each page is in and of itself, and then you just stack them all together, sandwich them in between your two covers and then punch your holes for stitching. The Japanese screw punch is a wonderful tool! It makes your holes so much cleaner and so much easier to punch than using an awl. I did not use the funky eyelash yarn actually in the stitch; I just added it after the stitch was complete for a little extra bling, or as Albie would say, “to tart it up a bit!” I really enjoyed making these as well and can see many more in my future, particularly with the types of covers I’ll share with you next. ;-)

Noble Stitch Book 2, Detail

Wednesday, March 2, 2011

An Artful Journey 2011: Do-Si-Do!


I never realized there were so many different book forms until I attended this retreat. And I also never realized that some of the simpler forms were just that: very simple, but still very fun. This little gal is called a Do-Si-Do. Any time any of us needed Albie’s help and she couldn’t get to us right then, she said, “Have you made a Do-Si-Do yet?” Meaning, go make yourself a simple little Do-Si-Do while you’re waiting. And given that my most favorite Girl Scout cookie is the Do-Si-Do, well, you know I had to make one!

These required no instructions, just a quick study of Ablie’s Do-Si-Do sample. This again started with one 12” x 18” sheet of painted paste paper, and from there it was really simple. I folded the paper in half longways, making it 6” x 18”, and then used a glue stick to glue the two 6” sides together. I then folded that down to 6” x 9”  and then folded each side again, down to an accordian like shape with 6” x 4.5” sections. From there it was just measuring and cutting the signatures and sewing them in with a simple pamphlet stitch. Viola! A cute little Do-Si-Do! I can see making these as fun little gifts; once the paste paper is painted, they are super duper easy to put together and seem to be a good way to use up scraps of good paper. Up next, my Noble stitch books!

Monday, February 28, 2011

An Artful Journey 2011 Day One: Simple Books

Olivia's Book
Last week, I shared with you some of the paste papers that I painted on the first day of classes at An Artful Journey. Today here’s a look at some of the simpler books we had the opportunity to create with our paste papers. What I enjoyed most about Albie’s class was the flexibility. She taught us different techniques, and then we could pick and choose what we wanted to do with the techniques. I knew that if Mama didn’t come home with something for the girls, my name would be mud, so I started by creating these simple little books for the girls.

Olivia's Book
First the paste papers…this was a fascinating and really relatively simple process. You can find paste paper tutorials on You Tube; each uses a little different recipe, many home grown. Albie taught us how to mix good old Elmer’s Art Paste with cold water and paint to create our colors. You vary the consistency of both the glue and the paint you are mixing in to get varying hues, saturation, and consistency of colors. From there, it’s all about putting paint to paper and using your imagination. Albie shared her HUGE supply of stencils and stamps with us to use in class, and I brought a few with me. We added paint and design and took away paint and design using the stencils, stamps, cosmetic sponges, credit cards, and mastic spreaders to create texture.

Sarah's Book
Sarah's Book
The covers for each of these little books was created using one 12” x 18” sheet of paste paper, and then I sewed two signatures in back to back; that was the tricky part! I prepped four total covers, but I’ve yet to sew signatures into two of them. I wanted to make sure I’d have some at home without signatures to remind myself how to do the fold. The finished books are 6" by about 4 1/4" after trimming to even the edges.

Covers without Signatures, front

Covers without Signatures, back
As you can see in the second photo above, Olivia has already completely filled in her little book, complete with a "The End!" on the last page. Sarah said she’d let me borrow hers until I had a chance to show all my friends and take photos of it. And as soon as I finished photographing them yesterday afternoon, she quickly took her book back and begin working in it.  Up next, a cute little Do-Si-Do book!

Wednesday, February 23, 2011

Artful Journey 2011 Sneak Peek


So, what a trip!  I flew through Dallas and was delayed in Dallas for more than three hours. First it was due to weather in the San Francisco area; that accounted for two hours.  Then they decided the weather had cleared enough, loaded us all on the plane, taxied out to the runway, and then turned around and went back to the gate.  "Well, folks, we've had an unknown malfunction warning pop up, so we'll have to have the mechanics check it out for us. I'm sure it will only take a few moments!"  An hour and 15 minutes later, all spent sitting in the plane, the unknown malfunction warning had finally been taken care of, and we were on our way. 

Leah picked me up at the airport and we headed for some lunch before driving on down to the retreat center.  And it rained, and rained, and rained some more!  And it didn't stop raining until Sunday, and there was even some snow thrown in there for good measure!  I'll share pictures of that with you later this week!

So for today, since I haven't had a chance to photograph any of my finished pieces yet, here is a peek at some of the paste papers I painted on Friday.  What a fun, messy process! And Albie is such a fun, wonderful teacher!  I can't wait to try more here at home.  The top piece is the uncut size of Utrecht paper we worked on, 12" x 18".  The bottom photo is some full size Utrecht pages and some smaller Stonehenge pages. The two smallest turquoise edged pieces are little pieces I painted at DJ Pettitt's background painting demo table Friday night.  All these yummy papers and then some became books.  More on those when I get a chance to photograph them this weekend!